I'm bringing this post to the top as I have added several tutorial links. My next flower should be the Victorian rose and the buttercream rose (worth the wait). I will be adding more flowers to this Index in the coming weeks. I hope you enjoy working with these flowers.
In the following posts I will show you techniques for making the following flowers with Royal Icing. Please be patient as I will be updating this index with instruction in the following post. For future reference, use this as a name guide and Index to step-by-step instructions.
Victorian roses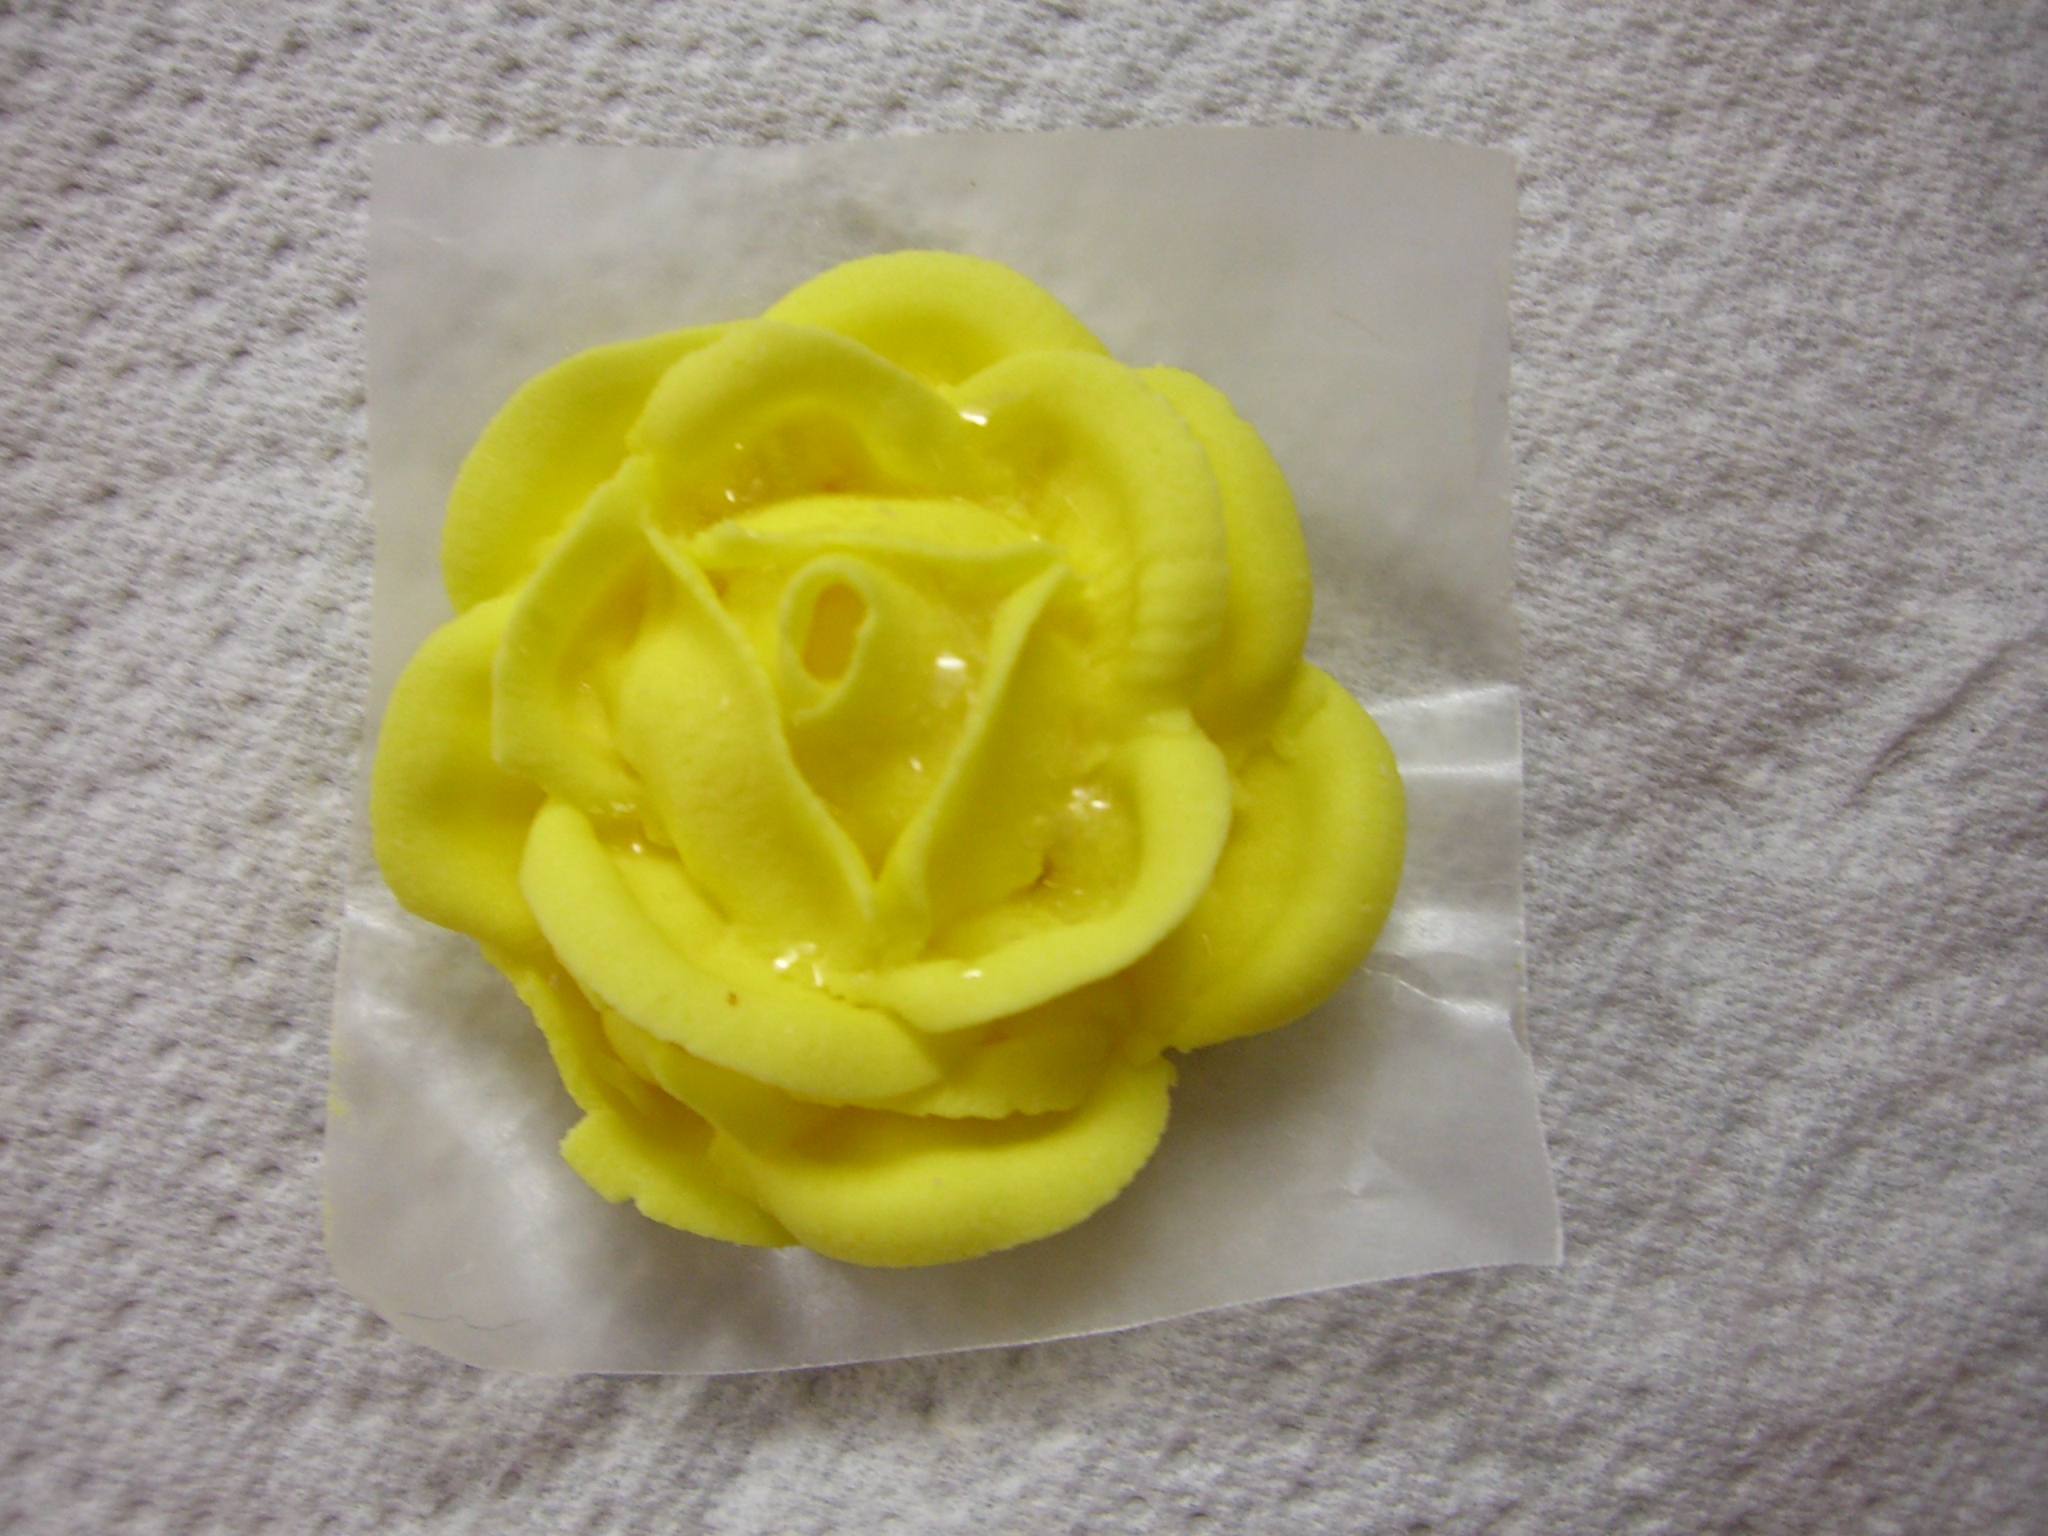
Daisies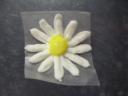
Click HERE for daisy flower step-by-step instructions.
Pansies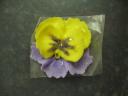
Click HERE for Pansy flower step-by-step instructions.
Chrysanthemum
Click HERE for Chrysanthemum flower step-by-step instructions.
Primrose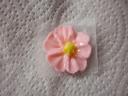
Click HERE for Primrose flower step-by-step instructions.
Violet and violet leaf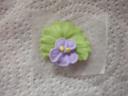
Click HERE for violet flower step-by-step instructions.
Click HERE for violet leaf step-by-step instructions.
Apple Blossom
(bright pink flower on lower left corner)
Click HERE for apple blosssom step-by-step instructions
Daffodils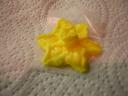
Click HERE for Daffodil flower step-by-step instructions.
Saturday, May 24, 2008
Icing Flowers (Royal Icing)
Royal Icing: Primrose
The primrose flower is a medium sized flower with heart shaped petals. You can find these flowers in different colors, including all yellow, blue with yellow centers and purple with yellow centers. These flowers are accent flowers that add a touch of elegance to any cake. Refer to the Flower Index for other flower's step-by-step instructions.
Primrose Flower
Tip: 103, 14, 1
Royal Icing: Pink (or color of choice)
Consistency: Medium
Royal Icing Recipe
Instructions
1. Looking down on your flower nail, imagine dividing the nail as follows: Note that the flower should be the size of the inner circle. 2. Using your tip 103 make the first hert shaped petal (depicted at the upper left corner of picture below) by sqeezing your piping bag slightly at a 45 degree angle from center to circle edge. At this point continue piping along the edge while gently using a gentle back and forth motion in the middle as you spin your flower nail slowly and proceeding to close the petal. Relax pressure, stop and slide out.
 3. Repeat to make four more heart shaped petals (for a total of five).
4. Add a small star center with tip 14.
 5. Add a small dot to the top of the star with Tip 1.
6. Dry in medium flower former.
*Picture of cake with this flower
Royal Icing: Pansy
Pansies are one of my favorite royal icing flowers because they look so complicated, but they are not. If you have tried the other flower tutorials I have previously posted, then trying this flower out should not be difficult. Pansies are found in nature in different colors, including all yellow or all dark blue. Add color by painting over them when dry or using color striped bag. Refer to the Flower Index for more flower instructions.
Pansy Flower
Tip: 104, 1
Royal Icing: yellow and violet (or color of choice)
Consistency: Medium Consistency
Royal Icing Recipe
Instructions:
1. Looking down on your flower nail, imagine dividing the nail as follows. The flowers will be the size of the whole circle.
 2. Using your tip 104 make the first yellow petal (one quarter of the circle). Squeeze bag lightly at 45 degree angle, to make and upside down U (as shown on picture below). Make sure that the U closes at the end – relax pressure, unite with the starting point, stop and slide out. Repeat to form the second yellow petal (second quarter of the circle).
 3. No let's make the violet petal. This is basically a single ruffled petal that will fill one half of the circle. Create this petal by starting like a single petal, but don't finish it. Instead, use a gentle back and forth motion to create a ruffled effect.
4. Add two shorter petals on top of the first two yellow petals (depicted in picture below in orange for visibility), positioned so that they are centered over the seams where the yellow petal meet with the single ruffled violet petal.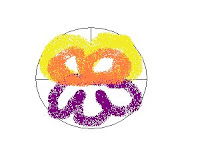 5. Add a tip 1 teardrop shaped loop center in yellow color (as shown in picture below).
 6. Dry in medium Flower Former.
7. When dry, dip a small brush in food coloring (violet in this case) and add violet stipes to top yellow flowers. *Picture of cake that depicts this flower.
Tuesday, May 13, 2008
Slice of Cake - Fondant

 This cake was actually 4 layer of chocolate cake with two fillings of chocolate mousse and one layer of "dulce de leche" (similar to caramel). It was so yummy!!

Friday, May 2, 2008
Buttercream: Chrysanthemum
Chrysanthemum Flower
Refer to the Flower Index for other flower links.
Materials
- Tips: #5 and #81 (Master Tip Set
, Measuring Cups and Tool Set)
- Icing: Buttercream - Medium Consistency
- Icing color: Your choice
- Prepared Flower Nail (attach wax paper square)
Instructions:
1- Prepare a bag of buttercream icing with tip #5 and another bag of same buttercream icing color with tip #81.
 2- Pipe a mound of icing with tip #5 at center of flower nail.
  3- Insert tip #85 with indent facing up) to the bottom edge of mound slightly. Squeeze bag and extend to the edge of inner circle and release pressure pulling slightly upwards at a 45 degree angle. Continue piping these petals around to create a row of base petals.
  4- Repeat by piping the next row of petals slightly shorter positioning them between the base petals and on top of the last row (don't forget to insert the tip slightly into the mound, squeeze the bag, pull and release pressure at a 45 degree angle).
5- Continue piping petals until the mound is covered with each row slightly shorter. It usually takes me about 4 rows.
6- At center of flower, pipe 3 vertical petals.
